
This post contains affiliate links. If you buy through our links, we may earn a commission at no extra cost to you.
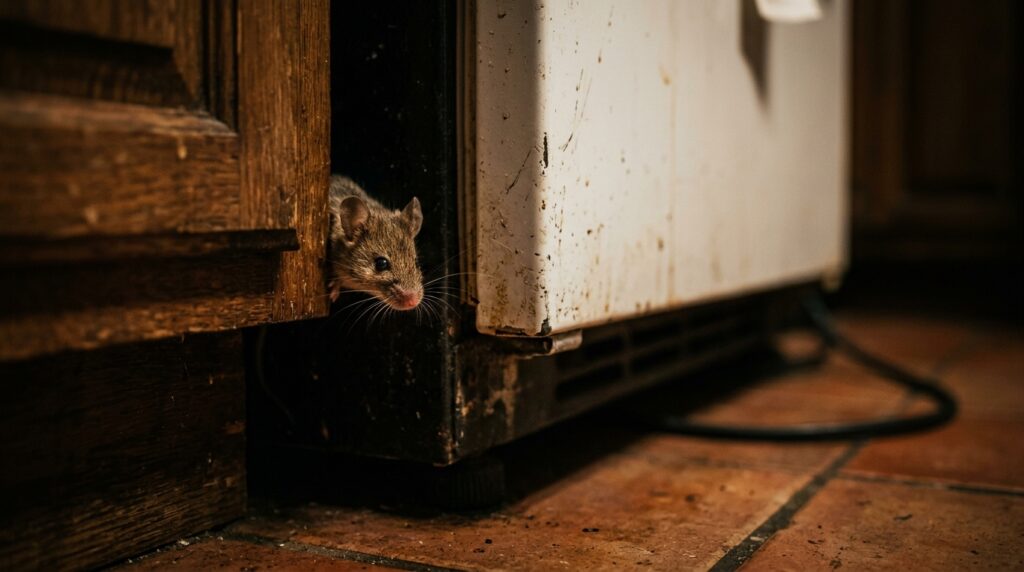
A mouse in the house rarely means just one mouse. Here’s the complete strategy for finding them, eliminating them, and sealing every gap so they can’t return.
⭐ Our Top Picks for Mouse Control:
• Victor Easy Set Mouse Trap (4-pack)
• Tomcat Mouse Killer Bait Station
• Catchmaster 72MAX Pest Trap Glue Boards
• DAP Platinum Patch Advanced Spackling
You heard it at 2am — a scratching sound inside the wall, or something moving behind the stove. Or you found the evidence: droppings in the cabinet, a corner chewed off the cereal box, a nest of shredded paper tucked behind the water heater.
Here’s what most people don’t know: a mouse in the house is almost never just one mouse. House mice live in family groups. If one found a way in, others are already there or soon will be. And they reproduce fast — a female can produce 5–10 litters per year with 5–6 pups each.
The good news is that mice are one of the more manageable pest problems with the right approach. DIY works well here — you don’t need an exterminator for most infestations. But you do need to do more than set a trap and hope.
Quick answer: The most effective DIY mouse control combines snap traps (Victor Easy Set is the standard) placed at active locations along walls, with simultaneous exclusion — sealing every gap ¼ inch or larger on the exterior of your home. Trapping without exclusion is a losing game; you catch some, but new mice keep entering. Both have to happen at once.
Step 1: Confirm You Have Mice (and Not Rats)
Mice and rats require different trap sizes and slightly different strategies. Before you buy anything, confirm which pest you’re dealing with.
Signs you have mice:
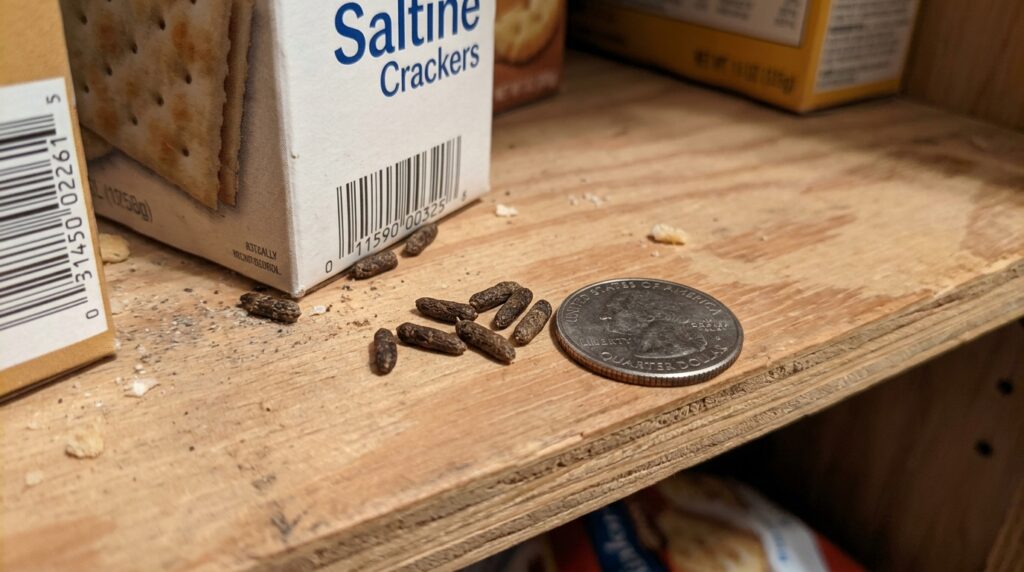
- Droppings: Small, ⅛ to ¼ inch long, rod-shaped with pointed ends, dark brown or black. Found along walls, in cabinets, in drawers, and wherever you store food.
- Gnaw marks: Mice chew constantly — on food packaging, wood, wiring insulation, and structural materials. Fresh gnaw marks are light-colored; older marks darken.
- Nesting material: Shredded paper, fabric, insulation, or plant material gathered into a ball. Common locations: inside walls, behind appliances, in storage boxes, inside large appliances.
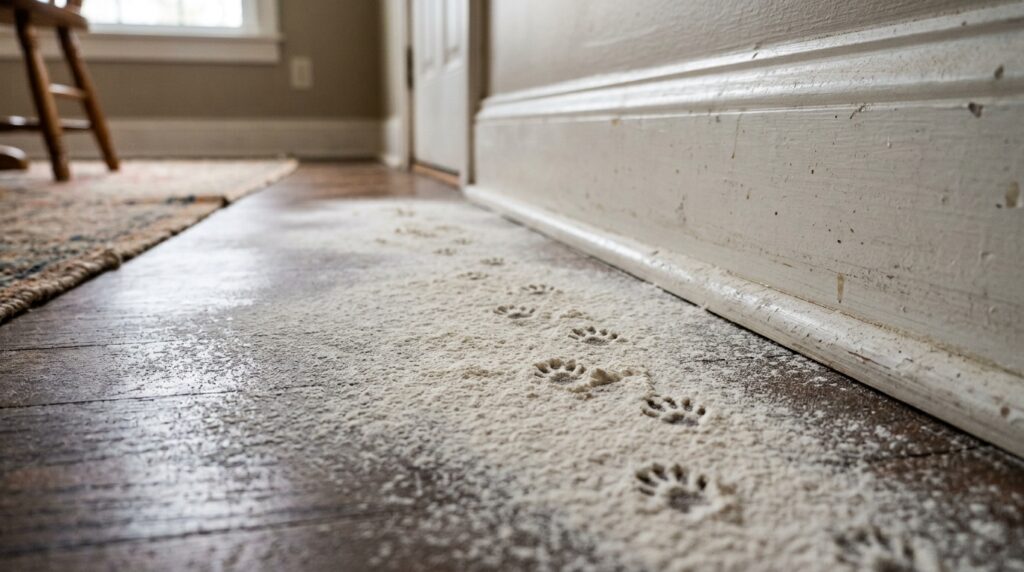
- Runways: Mice follow the same paths repeatedly, leaving grease marks along baseboards and walls from their oily fur. In dusty areas, you may see footprints.
- Sounds: Scratching, scurrying, or squeaking — usually at night, in walls, ceilings, or under floors.
Mice vs. rats — key differences:
- Mouse droppings: ⅛–¼ inch, pointed ends. Rat droppings: ¾ inch, capsule-shaped, blunt ends.
- Mice: small, 2.5–4 inches body length, large ears relative to body, light brown or gray
- Rats: much larger, 7–10 inches body length, smaller ears relative to body, heavier build
- Entry holes: Mice can squeeze through a gap the size of a dime (¼ inch). Rats need a gap the size of a quarter (½ inch).
If you’re dealing with rats, see our guide on how to get rid of rats in your yard — the strategy overlaps but trap sizing and bait station choices differ.
Step 2: Find Where They’re Active
Traps placed in the wrong location catch nothing. Before setting anything, spend 10 minutes mapping where mice are actually active. This is the step most people skip — and it’s the one that determines whether trapping works.
How to Find Active Areas
- Look for fresh droppings — dark, moist-looking droppings indicate recent activity. Dry, crumbling droppings are older.
- Check along walls and baseboards — mice rarely travel in open spaces. They run along the edge of walls, using them for navigation.
- Inspect behind and under appliances — the refrigerator, stove, dishwasher, and water heater are common nesting areas.
- Check the garage and basement — mice often enter through these spaces and nest before moving into the living area.
- Look in storage areas — cardboard boxes, stored clothing, and stacked items in closets and attics are prime nesting spots.
The Flour Test
If you’re not sure where mice are traveling, sprinkle a thin layer of flour or baking soda along the base of walls in suspect areas. Check after 24 hours. Mouse footprints in the flour tell you exactly where they’re running — and that’s exactly where traps go.
Step 3: Set Snap Traps — Your Primary Tool
Snap traps are the fastest, cheapest, and most effective way to reduce a mouse population. Electric traps and glue boards have their place, but snap traps are the baseline.
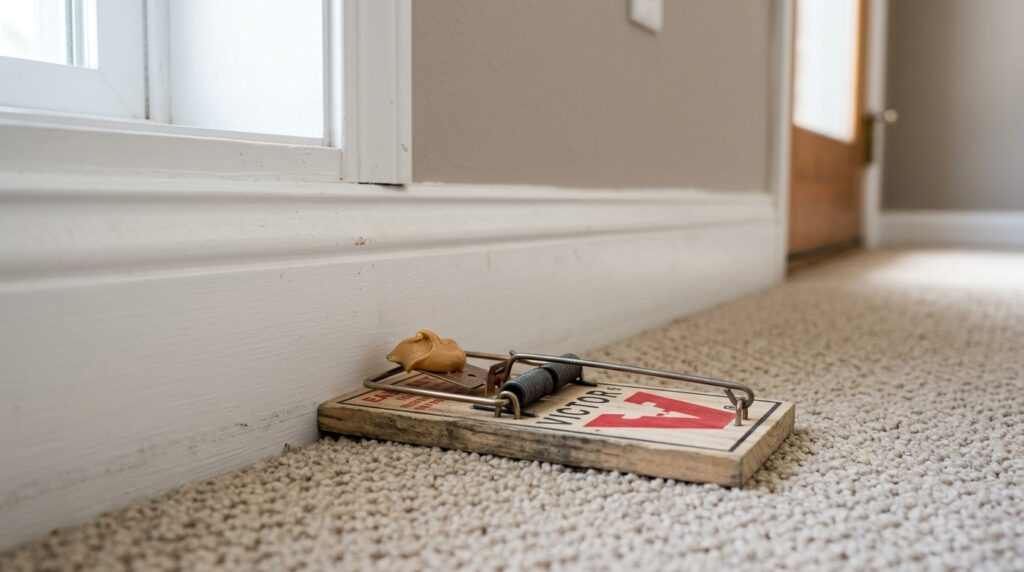
Best snap trap: Victor Easy Set Mouse Trap (4-pack)
The Victor Easy Set has been the standard for decades. It’s reliable, fast, and kills instantly. The pedal-style trigger is easy to set without hurting yourself, and the trap can be disposed of with the mouse inside — no need to handle the carcass.
Placement Rules That Actually Matter
Most people set traps in the middle of the floor. Mice almost never cross open floor space. The correct placements are:
- Against the wall — place traps with the trigger end touching the baseboard. Mice run along walls and step directly onto the trigger.
- In pairs — set two traps side by side, triggers facing opposite directions. A mouse that jumps over one trap often lands on the other.
- At active locations — where you found droppings, gnaw marks, or flour-test footprints. Not just “in the kitchen” but specifically at the corner behind the stove where you found droppings.
- Under sinks and behind appliances — these are the highest-value locations in most houses. Set 2–3 traps per location.
- In the garage and basement — if mice are entering from outside, these transitional spaces are critical.
How many traps?
Most people use too few traps. For a moderate infestation, set a minimum of 6–12 traps spread across active areas. More is better — mice are trap-shy after the first few catches, and having traps everywhere increases the odds.
What to Use as Bait
- Peanut butter — the standard. Nutty smell carries well, mice have to work to get it (triggering the trap), and it doesn’t dry out as fast as other baits.
- Chocolate — effective, especially in winter when mice seek high-calorie food
- Nesting material — a small piece of cotton ball or dental floss encourages mice to pull at it and trigger the trap. Especially effective when you know mice are nesting nearby.
- Hazelnut spread — works as well as peanut butter, sometimes better
Use a very small amount of bait — a pea-sized smear is enough. Too much bait lets mice eat around the edges without triggering the trap.
Check and Reset Daily
Check every trap every 24 hours. Reset triggered traps immediately. A dead mouse left in a trap for days warns other mice away. Wear disposable gloves when handling traps, bag catches, and dispose in the trash.
Step 4: Consider Additional Tools for Harder Situations
Glue Boards (for Monitoring and Tight Spaces)
Glue boards catch mice that cross them and are useful in two situations: monitoring activity levels (count catches to gauge population) and in very tight spaces where snap traps won’t fit.
Best option: Catchmaster 72MAX Pest Trap Glue Boards
Important: glue boards are not a humane kill method. A mouse caught in a glue board will die slowly unless you dispose of it promptly. If this is a concern, stick with snap traps or electric traps.
Bait Stations (for Large Populations or Ongoing Prevention)
Rodenticide bait stations use anticoagulant poison in a tamper-resistant housing. They’re effective for large populations and ongoing prevention — especially in garages, attics, and basements.
Best option: Tomcat Mouse Killer Bait Station
Important caveats on rodenticide:
- Secondary poisoning risk: A pet or predator eating a poisoned mouse can be secondarily poisoned. If you have cats or dogs that roam the same areas, use snap traps instead.
- Mice die in walls: Unlike snap traps, rodenticide kills mice wherever they happen to be when they die — which is often inside a wall. This can cause odor for 1–2 weeks.
- Use in enclosed locations only: Place bait stations against walls in the garage, basement, or attic — not in living areas where children and pets have access.
Step 5: Find and Seal Every Entry Point
This is the step that determines whether your mouse problem is a one-time fix or a recurring annual battle. Trapping without exclusion is just keeping up with demand — you catch the mice inside, but new ones keep entering from outside.
A house mouse can squeeze through a gap the size of a dime — ¼ inch. This means exclusion requires genuine attention to detail. Walk the entire exterior of your house and check every point where something penetrates the wall, foundation, or roof line.
Most common mouse entry points:
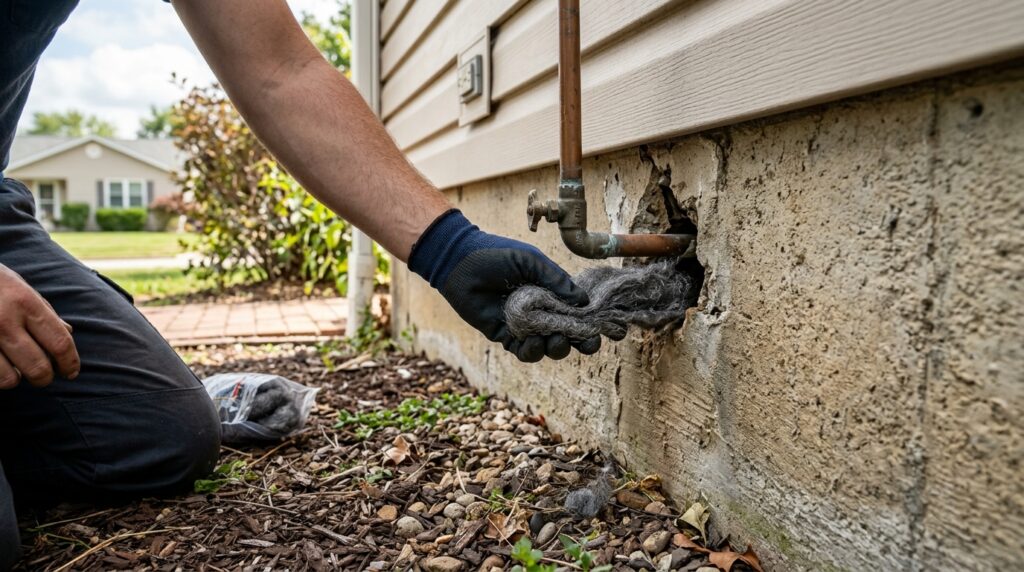
- Gaps around pipes and utility lines where they enter the foundation or wall — plumbing, electrical conduit, gas lines, cable TV
- Gaps under exterior doors — especially garage doors. Even a ¼-inch gap at the threshold is enough.
- Foundation cracks — hairline cracks in concrete can be large enough for a mouse
- Gaps between the sill plate (the wood that sits on top of the foundation) and the foundation — common in older homes
- Unscreened vents — attic vents, crawl space vents, dryer vents
- Gaps around windows at ground level — especially where window frames meet the siding
- The garage — mice often enter through gaps at the sides of the garage door, gaps around service doors, and gaps where utilities enter
What to seal with:
- Steel wool packed into gaps — mice cannot chew through it. Secure with caulk so it stays in place. Best for gaps around pipes and utility lines.
- Hardware cloth (¼-inch mesh) for larger openings like vents and crawl space entries. Cut to fit and staple or screw in place.
- Caulk or expanding foam for cracks in the foundation and gaps around window frames. Mice can chew through foam alone — combine with steel wool for any gap larger than ¼ inch.
- Door sweeps for gaps under exterior doors and garage doors. These are the single most underused exclusion tool.
Walk the entire exterior systematically: foundation → doors and windows → utility penetrations → vents → roof line. Take a flashlight and check from inside too — daylight visible through a gap from inside the basement or attic means mice can fit through it.
Step 6: Remove What’s Attracting and Sheltering Them
Trapping and exclusion fix the immediate problem. These changes reduce the long-term attractiveness of your home to mice:
Food:
- Store all dry goods — cereal, rice, flour, pasta, pet food — in hard-sided sealed containers. Mice chew through cardboard and thin plastic easily.
- Don’t leave pet food out overnight. Feed indoors, bring bowls in after meals.
- Empty the trash regularly, especially the kitchen trash. Use bins with tight-fitting lids.
- Clean up crumbs and spills immediately — under and behind the stove and refrigerator are the most commonly overlooked spots.
Harborage:
- Stack firewood at least 18 inches off the ground and at least 20 feet from the house. Woodpiles are prime mouse habitat.
- Remove debris piles, old equipment, and anything stored directly on the ground around the house perimeter.
- Trim grass and vegetation within 18 inches of the foundation — tall grass gives mice cover to approach the house undetected.
- In the garage and basement: get cardboard boxes off the floor and switch to plastic bins with lids. Cardboard is both nesting material and food for mice.
Frequently Asked Questions
How many mice do I have if I see one?
House mice are rarely solitary. If you see one mouse, there are almost certainly more — the typical home infestation is 5–20 mice, sometimes more. A rough indicator: if you’re finding droppings in multiple rooms or hear sounds regularly, the population is established. Glue board or snap trap catch counts over 48 hours give a better picture than sightings.
Do mice come back every year?
Yes — if you don’t seal the entry points. Mice that live outdoors move inside in fall when temperatures drop, using the same entry routes year after year. If you trap without sealing, you’ll solve this year’s problem but face the same situation next October. Exclusion is the only permanent fix.
Are mice dangerous?
Mice carry hantavirus (rare but serious), salmonella, and leptospirosis. Their droppings, urine, and nesting materials can contaminate food preparation areas. Mouse urine and droppings can trigger asthma in children. Always wear gloves and a dust mask when cleaning areas where mice have been active, and disinfect surfaces with a bleach solution (1 part bleach to 10 parts water) before wiping.
Will mice leave on their own if I remove food sources?
Unlikely. Once mice are established inside a warm structure, they have everything they need — shelter, nesting material, water. Removing easily-accessible food reduces the population somewhat but doesn’t eliminate an established infestation. Active trapping is required.
Do ultrasonic repellers work on mice?
No. Multiple university studies have found that mice quickly habituate to ultrasonic devices and resume normal activity within days of exposure. They’re not an effective control method. The money is better spent on additional snap traps.
Final Thoughts
Getting mice out of your house requires two things working together: trapping to eliminate the population inside, and exclusion to stop new mice from entering. Either one alone is temporary.
Start trapping immediately — set more traps than you think you need, in the right locations (against walls, at active spots), and check them daily. At the same time, walk your home’s exterior and seal every gap ¼ inch or larger. Steel wool plus caulk at pipe penetrations, door sweeps on exterior doors, hardware cloth over vents.
Most infestations clear within 2–3 weeks of consistent trapping. The exclusion work takes a weekend but lasts indefinitely.
Hearing mice in the walls specifically? See our guide on how to get rid of mice in walls for targeted strategies when the infestation is inside the wall cavity. Dealing with rats instead? Our guide on how to get rid of rats in your yard covers the outdoor treatment strategy.