
This post contains affiliate links. If you buy through our links, we may earn a commission at no extra cost to you.
Mice inside the walls are harder to reach — but not harder to eliminate. Here’s the exact method: locate activity, place traps at the right entry points, and seal the gaps that let them in.
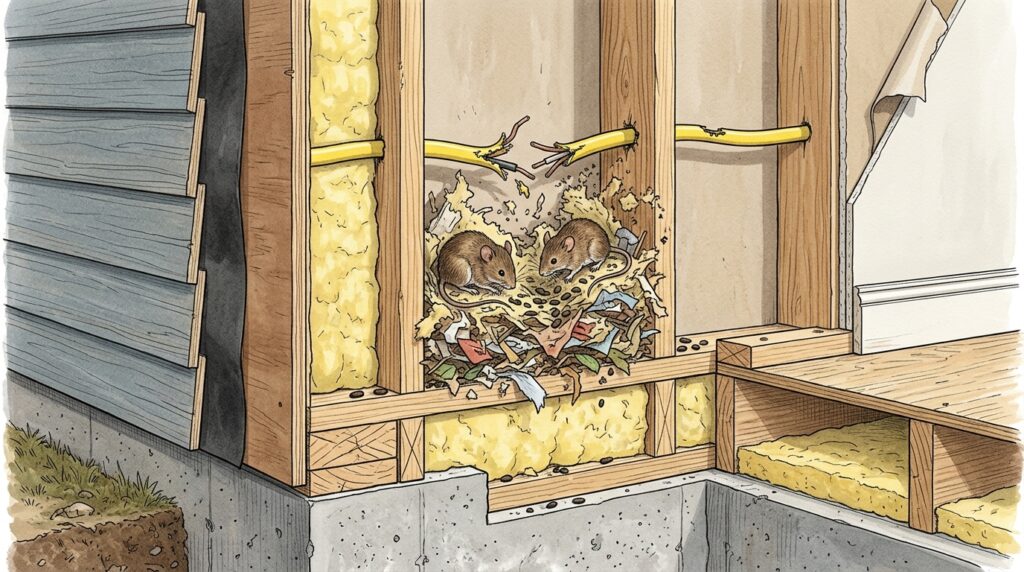
You’re lying in bed and you hear it: scratching, gnawing, or faint scurrying sounds coming from inside the wall. You’re not imagining it. A mouse — probably more than one — has found a way into the wall cavity and is using it as a travel corridor or nesting site.
The frustrating part about mice in walls is that you can hear them but you can’t easily get to them. Snap traps on the floor won’t catch a mouse that’s traveling inside the wall structure. And the longer they stay in there, the more damage they do to insulation, wiring, and drywall.
The good news: you don’t need to tear open the wall to solve this. You need to understand how mice use wall spaces — and place traps at the points where they enter and exit.
The strategy in short: Mice in walls are caught at the wall’s entry and exit points — not inside the wall itself. Locate activity, trace travel routes, set traps at gaps and openings, and seal entry points from the outside. This guide walks through each step.
Why Mice Get Into Walls (and What They’re Doing In There)
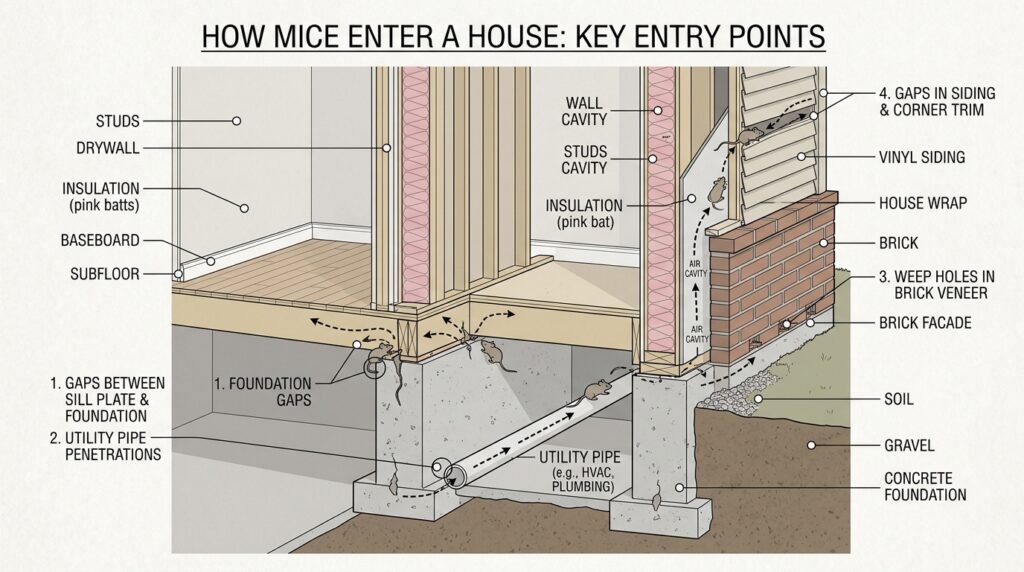
Wall cavities are close to ideal mouse habitat: warm, dark, protected from predators, and usually undisturbed. Mice enter walls through gaps in the foundation, around utility penetrations (pipes, wires, conduits), through weep holes in brick, and via gaps where exterior siding meets the framing.
Once inside, they do three things:
- Travel — walls connect different areas of the house. A mouse can move from the basement to the attic without ever being on the main floor.
- Nest — wall cavities packed with insulation are excellent nesting sites. Female mice will choose the wall over open floor space almost every time.
- Gnaw — mice have to gnaw to keep their continuously growing incisors short. Wiring insulation, wooden studs, and even PVC pipes are all targets.
The sounds you hear (scratching, gnawing, scurrying) tend to be loudest at night because mice are nocturnal. Scratching and gnawing in a fixed location often indicates a nest. Rapid scurrying that moves suggests a travel corridor.
Step 1: Locate Exactly Where the Activity Is
Before you set a single trap, spend a few days mapping where in the wall the mice are active. This determines where to focus your effort.
Listen and mark
At night (after 10pm), sit quietly in each room where you’ve heard sounds. Listen for a full 10–15 minutes. Use a phone’s voice recorder to capture sounds — playback often reveals patterns not obvious in real-time. Mark on a rough sketch of your home layout exactly which wall and which height (low, mid, high) the sounds are coming from.
Check for exit points at floor level
Mice traveling inside walls exit through gaps at the bottom to forage for food. Check along all baseboards in rooms adjacent to active walls for:
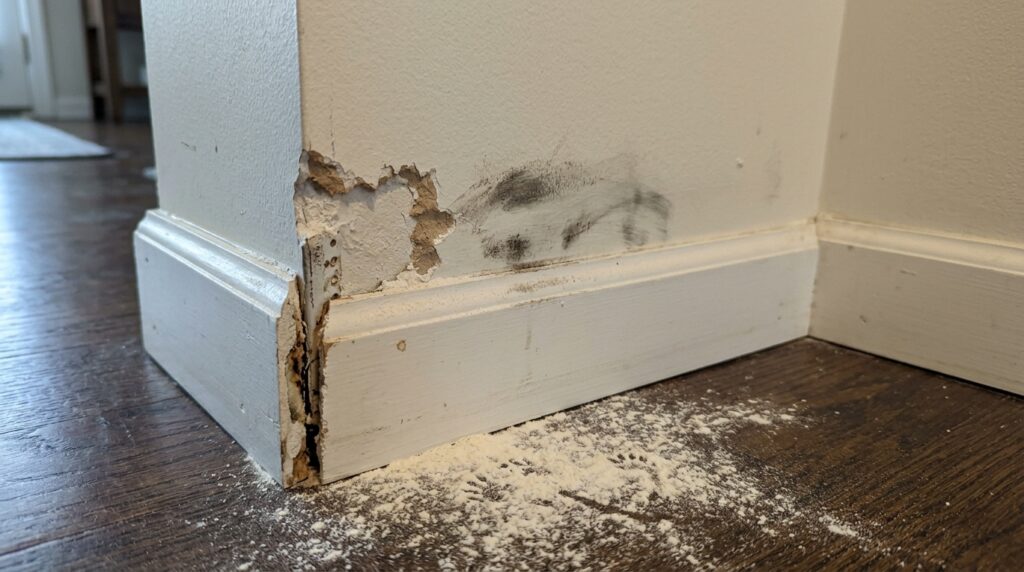
- Gnaw marks in drywall at or near baseboard level
- Dark rub marks (grease/oil from mouse fur) at gap edges
- Droppings clustered along baseboards
- Small gaps at corners where baseboard meets the wall — even a gap of ¼ inch is large enough for a mouse
Check behind appliances and fixtures
Mice exit walls through gaps behind refrigerators, stoves, dishwashers, and washing machines. Pull these appliances out and look for droppings, gnaw marks, and rub marks on the wall behind them. These are high-priority trap locations.
The flour test for wall exits
Sprinkle a thin line of flour along the baseboard of the active wall — approximately 2 feet on either side of where you suspect an exit point. Check after 24 hours. Mouse footprints in the flour confirm exit locations and show direction of travel.
Step 2: Set Traps at Wall Entry and Exit Points
The fundamental principle: you can’t trap a mouse inside the wall, so you trap it the moment it comes out. This means placing traps directly at exit points — at gaps, openings, and the areas adjacent to suspected entry locations.
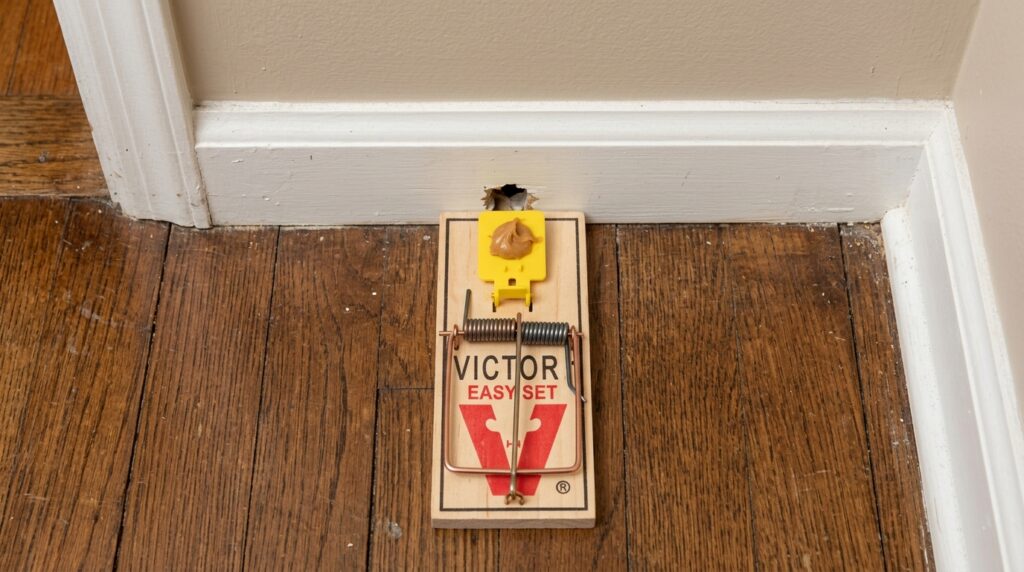
At baseboard gaps and gnaw holes
Place snap traps with the trigger end directly against the gap or hole — the trigger should be as close to the opening as possible, positioned perpendicular to the wall so a mouse exiting the hole steps directly onto it. If the gap is at floor level, the trap should be at floor level. Don’t place it 2 feet down the wall because that’s more visible — proximity to the exit point is what matters.
Products:
Victor Easy Set Mouse Trap (6-pack)
Behind appliances
Appliance gaps are major mouse highways. Place 2–3 snap traps behind the refrigerator and stove, triggers facing the wall gaps. Don’t move the appliance to check — slide a flashlight underneath to check activity without disturbing the traps. Disturbed traps train mice to be cautious.
At pipe and conduit penetrations
Every place a pipe or wire enters the wall is a potential exit point. Under sinks (the gap around drain pipes), behind the washing machine (water supply and drain), at HVAC duct openings — check all of these. Place traps alongside the pipe at floor level with the trigger facing the penetration gap.
In the basement and attic
If you have an unfinished basement or accessible attic, these are where the wall cavities open up. Check the top plates of walls in the basement (the horizontal beam at the very top of the basement wall framing) — mice frequently travel along these and drop into wall cavities through any gaps. Set traps along joists and top plates, triggers perpendicular to the direction of travel.
In the attic, focus on soffit vents, gable vents, and the points where exterior walls meet the roof framing. These are common entry points from the outside.
Trap density matters:
For an active infestation with mice confirmed in walls, set a minimum of 8–12 traps total across all identified exit and entry points. Under-trapping (2–3 traps) is the most common reason DIY trapping fails.
Special Situation: Dead Mouse Smell in the Wall
If you used rodenticide bait (poison blocks or pellets) inside the walls or in areas where mice travel between walls, there’s a significant risk of a mouse dying inside the wall cavity where you can’t retrieve it. A decomposing mouse in a wall produces a strong, unmistakable odor that can last 1–3 weeks.
What to do:
- Do NOT use rodenticide inside wall cavities or in enclosed spaces. If mice eat poison in the wall and die there, retrieval is extremely difficult without cutting drywall.
- If the smell is active now and you suspect a dead mouse: the odor will peak around day 3–5 and decline as the body desiccates. In low-humidity climates, it typically resolves in 1–2 weeks. In high-humidity environments, it can take 3+ weeks.
- Locate the strongest smell point by pressing against the drywall across the wall. The spot directly over the carcass will smell strongest. In extreme cases where the smell is intolerable, a small access hole (drywall saw, 3-inch diameter) at that location allows retrieval — patch with a drywall repair kit afterward.
- Odor neutralizers (activated charcoal bags, odor-absorbing gel packs placed in the room) reduce ambient smell during the resolution period but don’t eliminate the source.
DAP Spackling for small access holes:
Step 3: Seal Entry Points — The Fix That Makes It Permanent
Trapping eliminates the mice currently in your walls. Sealing entry points prevents new mice from getting in. Without sealing, you’ll be trapping indefinitely.
Identify exterior entry points
Walk the exterior of your home and look for:
- Foundation cracks — any crack wide enough to fit a pencil is wide enough for a mouse
- Gaps where utility lines (electric, cable, gas, water, HVAC) enter the foundation or exterior walls
- Weep holes in brick construction — these are intentional ventilation gaps but mice use them freely
- Gaps where siding boards meet the foundation or each other
- Gaps around window and door frames, especially at the corners
- Roof soffits, gable vents, and ridge vents — mice access attics from the roofline
Sealing materials by gap size
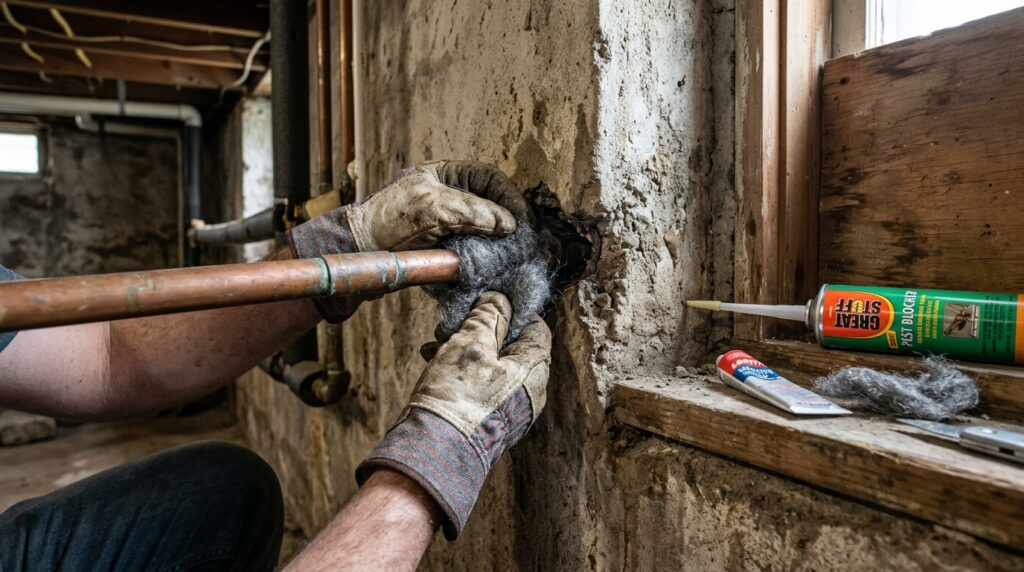
Small gaps (under ½ inch) — Steel wool + caulk:
Pack steel wool into the gap first (mice can’t chew through it) and secure it with DAP latex caulk. The caulk holds the steel wool in place and provides a finished surface. This works for gaps around pipes, wiring, and small foundation cracks.
Medium gaps (½ inch to 1 inch) — Copper mesh + expanding foam:
Stuff copper mesh (not steel wool for larger gaps — it compresses and mice can push through) into the gap and seal with expanding foam. Let foam cure fully before trimming flush.
Large gaps (over 1 inch) — Hardware cloth + foam or caulk:
Cut ¼-inch hardware cloth (galvanized wire mesh) to size and staple or screw it over the opening. Seal the edges with foam or caulk. This is the right approach for large vent openings, soffit gaps, and open pipe chases.
Weep holes in brick:
Use commercial weep hole covers (plastic inserts that allow air but block entry) rather than sealing them completely — weep holes serve a moisture management function and shouldn’t be permanently sealed.
Interior gaps — don’t forget these
Seal gaps from the inside too, especially around pipe penetrations under sinks and behind appliances. Use steel wool + caulk for small gaps; for larger openings around drain pipes, a pipe collar cover plate screwed to the drywall eliminates the gap cleanly.
What to Expect: A Week-by-Week Timeline
Days 1–3:
Set all traps. Expect first catches within the first 24–48 hours if you’ve placed traps correctly at active exit points. Check daily. Reset and rebait every trap you catch from.
Days 4–7:
Catch rate should be declining if you’ve covered the main exit points. If you’re still catching 2+ mice per day, add more traps or reposition to higher-activity locations.
Week 2:
Catch rate should drop to 1–2 total for the week. Begin exterior sealing during this period — doing it too early can trap mice inside with no exit, leading to dead mice in the wall.
Week 3:
Zero catches for 5–7 consecutive days = infestation resolved. Complete all interior and exterior sealing. Leave traps in place (unbaited or lightly baited) for another week as a monitoring check.
Important sequencing note:
Do NOT complete all exterior sealing in the first 24 hours. Seal the obvious large gaps immediately, but leave some minor entry routes open while active trapping is underway. If you seal everything on day one, surviving mice have no exit from the wall and will die inside — producing odor you can’t resolve without cutting drywall. Trap first, seal last.
When to Call a Professional
DIY trapping and sealing resolves the majority of mice-in-walls situations. Call a pest control professional when:
- After 3 weeks of active trapping, catch rates aren’t declining — this indicates a larger population than expected, or entry points you haven’t located
- You can hear activity in inaccessible areas (between floors, inside interior walls with no exterior access points) where standard exclusion and trapping can’t reach
- You find evidence of wiring damage (chewed insulation on electrical wires is a fire risk — this elevates urgency significantly; call an electrician as well)
- There is a strong ammonia smell from urine in an enclosed area, suggesting a large established nest you can’t locate
Professional exterminators can perform whole-house exclusion work, access crawl spaces and attic areas safely, and use commercial rodenticide bait stations where appropriate and with proper secondary poisoning precautions.
Frequently Asked Questions
Can mice get trapped inside walls and die there without poison?
Yes — if you seal all entry/exit points before the mice inside have been eliminated, they’ll be trapped and die in the wall. This is why the sequencing matters: trap first, then seal. The trapping phase creates controlled exits where mice come out and are caught. Only seal completely when catch rates have dropped to zero for several days.
How do I know if the mouse in the wall is alone or part of a larger infestation?
Mice are rarely alone. A single mouse in a wall almost always means at least 3–5 more nearby, often including a nesting female. Volume and pattern of sounds give clues: scratching in one fixed spot (likely a nest) suggests more mice than random scurrying. Set traps for the infestation assumption — 8+ traps — rather than trying to catch “just the one.”
Will the mice leave on their own in winter?
The opposite — mice move inside in fall as temperatures drop, seeking warmth. They don’t leave voluntarily in winter. A mouse that found its way into your wall cavity in October is likely to overwinter there, produce 2–3 litters before spring (a female mouse can have 5–8 pups per litter, every 3 weeks), and by the following fall you have a significantly larger population.
Is scratching inside the wall always mice?
Not always. Squirrels, flying squirrels, and chipmunks also access wall spaces and attics. Squirrels tend to be louder and more rhythmic (they run more than scurry). Bats occupy attic spaces and produce a high-pitched chittering distinct from rodent scratching. Listen to the pattern: persistent light scratching at night = almost certainly mice; loud rhythmic sounds during daytime = more likely squirrels. The elimination approach differs enough that it’s worth confirming before committing to a method.
The Bottom Line
Mice in walls feel like a bigger problem than mice on the floor — but the fix is the same, just applied at different locations. The wall cavity is their travel route, not a fortress. Identify where they’re exiting, place traps at those points, and seal entry points from the outside once trapping has run its course.
The two most important things to get right: trap density (more traps, not fewer) and sequencing (trap before you seal). Get those two things right and most infestations resolve in 2–3 weeks.
For the complete mouse elimination strategy beyond the wall — floor-level traps, exclusion materials, and removing what attracts them in the first place — see our full guide on how to get rid of mice in your house. For a comparison of every trap type available, see our guide to the best mouse traps.